How to Make a Perfect Raspberry Filling for Any Dessert
There’s nothing like a rich, sweet, and slightly tart raspberry filling to add a pop of flavor to your baked goods. Whether you’re using it to fill cakes, pastries, pies, or even to spoon over pancakes, this homemade raspberry filling is versatile and easy to make. The balance of juicy raspberries, bright lemon juice, and just enough sweetness makes it an instant favorite!
In this post, I’m going to walk you through the steps to create a delicious raspberry filling from scratch that will level up all your desserts. It’s super simple and only takes a few minutes!
Why Make Your Own Raspberry Filling?
1. Fresh and Flavorful
Store-bought fillings just don’t compare to the taste of a homemade version made with fresh ingredients. This filling bursts with natural raspberry flavor, and the touch of lemon juice adds just the right amount of brightness.
2. Perfect for a Variety of Desserts
This raspberry filling is versatile enough for a wide range of desserts. From cupcakes and layer cakes to cheesecakes, pastries, and even breakfast treats like crepes or waffles—this filling works with just about everything!
3. Quick and Easy
With only four ingredients and a short cooking time, you’ll have a delicious filling ready in no time. Plus, you can make it ahead and store it in the fridge for when you need it.
Ingredients for Raspberry Filling
Here’s what you’ll need for this easy raspberry filling recipe:
- 1 ½ cups raspberries (fresh or frozen)
- 2 tablespoons lemon juice
- 1 tablespoon corn starch
- ¼ cup sugar
That’s it! Just four simple ingredients to make a delicious homemade raspberry filling.
How to Make Raspberry Filling
Step 1: Combine the Ingredients
In a small saucepan, combine raspberries, lemon juice, and sugar over medium heat. Stir gently to coat the raspberries in the sugar and lemon juice.
Step 2: Thicken with Cornstarch
While the raspberries are heating, whisk together 1 tablespoon of corn starch and 2 tablespoons of water in a small bowl until smooth. Once the raspberry mixture starts to bubble, slowly add the cornstarch mixture, stirring continuously.
Step 3: Cook Until Thickened
Continue to cook the raspberry mixture, stirring frequently, for about 3–5 minutes, or until it thickens to your desired consistency. The filling should be glossy and coat the back of a spoon.
Step 4: Cool and Use
Once thickened, remove the saucepan from the heat and let the filling cool. You can strain the filling through a fine mesh sieve if you prefer a smoother consistency (without the seeds), or leave it as is for a more rustic texture.
Use your raspberry filling immediately, or store it in an airtight container in the fridge for up to a week.
Tips for the Best Raspberry Filling
1. Fresh or Frozen Raspberries
You can use either fresh or frozen raspberries for this recipe. If using frozen, no need to thaw them first—just add them straight to the saucepan. They’ll break down as they cook and release their juices, creating a perfect filling.
2. Adjust Sweetness
If you prefer a sweeter filling, feel free to add a little more sugar. Similarly, if you like your raspberry filling to be more tart, you can reduce the sugar or add an extra splash of lemon juice.
3. Strain for Smoothness
If you’re not a fan of the seeds in raspberries, simply strain the cooked filling through a fine mesh sieve to remove them. This will give you a silky smooth filling that’s perfect for piping into desserts.
4. Add a Touch of Vanilla
For an extra layer of flavor, try stirring in ½ teaspoon of vanilla extract after the filling has thickened. The vanilla adds a nice warmth that pairs beautifully with the tartness of the raspberries.
How to Use Raspberry Filling
This raspberry filling is incredibly versatile and can be used in so many ways. Here are just a few ideas to get you started:
1. Cake Filling
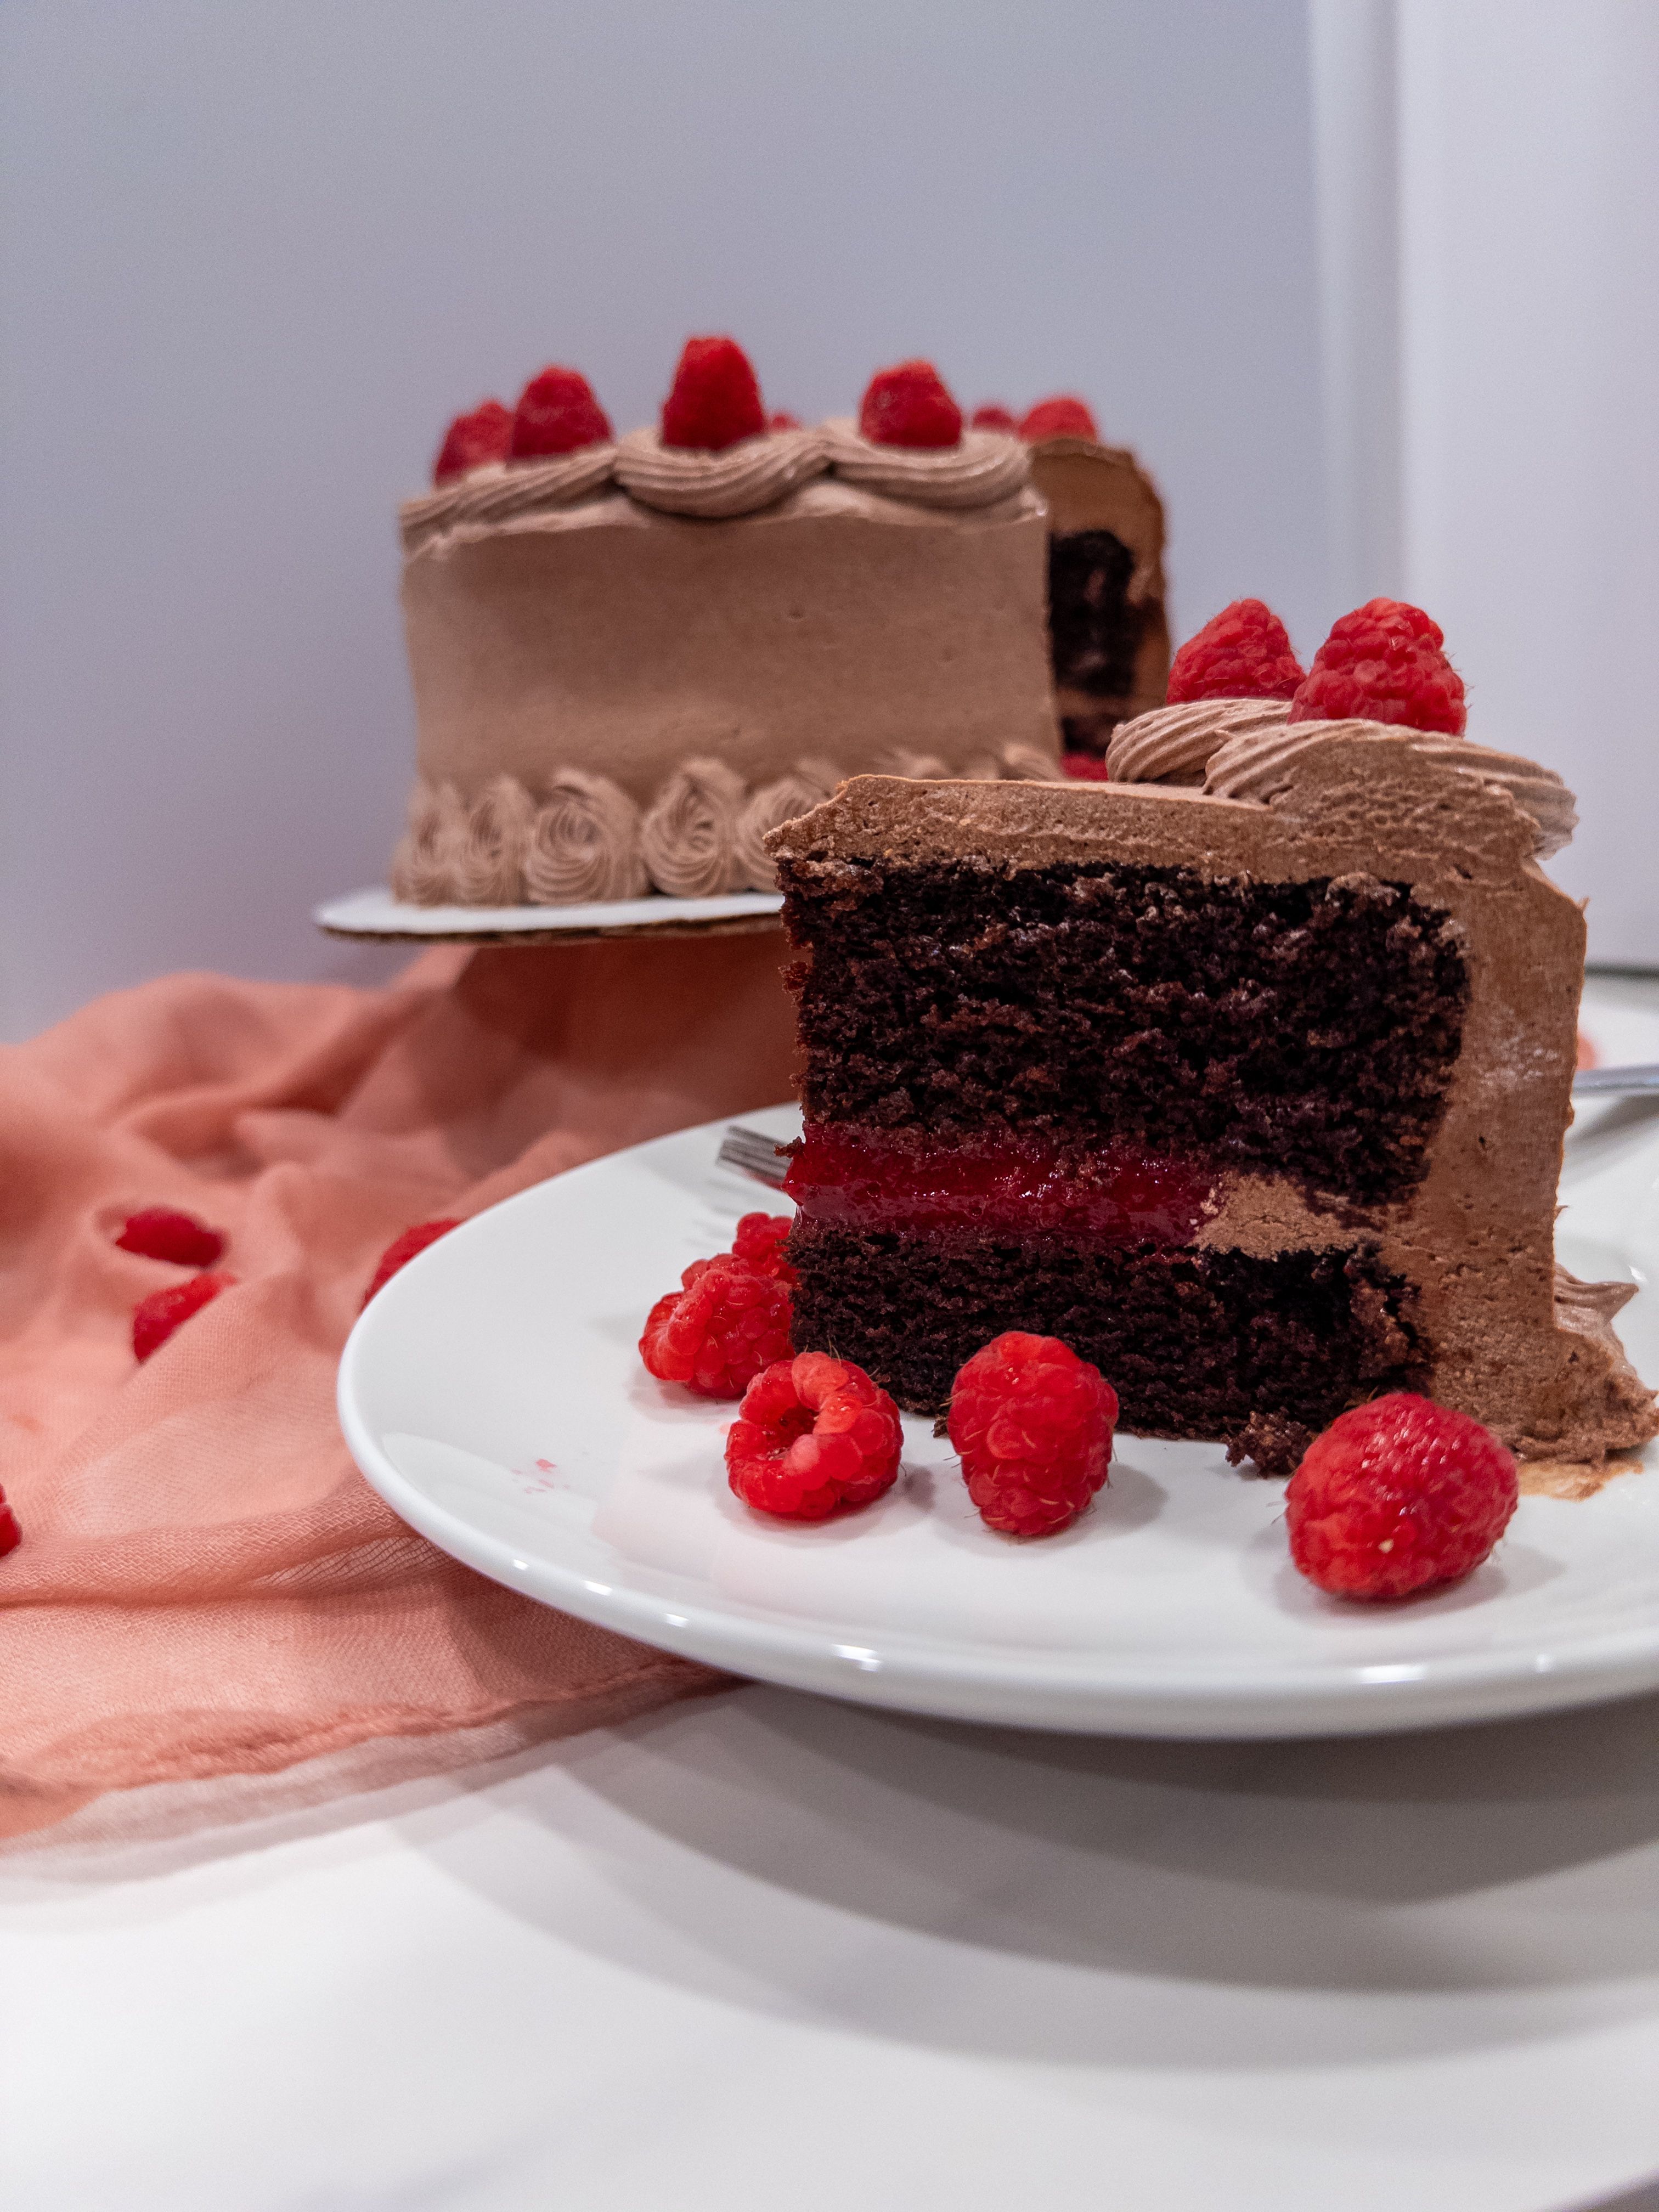
Spread this raspberry filling between layers of a classic vanilla or chocolate cake for a fruity twist. It’s especially perfect in red velvet cake or chocolate torte.
2. Pastries and Tarts
Spoon the filling into pastries, turnovers, or mini tarts for a delicious fruit-filled treat. It also works wonderfully as a base for a raspberry pie.
3. Cheesecake Topping
Drizzle it over a plain cheesecake for a pop of color and a burst of tangy flavor. You can swirl it into the batter before baking for a gorgeous marbled effect.
4. Breakfast Treats
This filling makes a delightful topping for pancakes, waffles, crepes, or even French toast. It’s also a great addition to yogurt or oatmeal bowls for a touch of sweetness.
Frequently Asked Questions
Can I use frozen raspberries to make this filling?
Absolutely! Frozen raspberries work just as well as fresh. Just add them directly to the saucepan and follow the same steps.
How long does homemade raspberry filling last?
You can store your homemade raspberry filling in an airtight container in the fridge for up to one week. If you want to keep it longer, you can freeze it for up to three months. Just thaw it in the fridge overnight before using.
Can I make raspberry filling without cornstarch?
Yes, you can substitute the cornstarch with arrowroot powder or all-purpose flour to thicken the filling. Just make sure to adjust the quantity—use a little more flour, or an equal amount of arrowroot powder.
Variations on Raspberry Filling
1. Mixed Berry Filling
Mix it up by combining raspberries with other berries like blueberries, blackberries, or strawberries for a mixed berry filling. This adds complexity to the flavor and works great in summer desserts.
2. Spiked Raspberry Filling
For a grown-up twist, add a splash of liqueur like Chambord (a raspberry-flavored liqueur) or Grand Marnier (orange-flavored liqueur) for a boozy touch.
3. Lemon Raspberry
Amp up the lemon flavor by adding zest from one lemon to the filling. This makes the raspberry filling even more bright and tangy, perfect for summer desserts or lemon-flavored cakes.
4. Chocolate Raspberry
Pair your raspberry filling with chocolate by drizzling it over a rich chocolate cake or folding it into chocolate mousse. The combination of sweet, tart raspberries and decadent chocolate is divine!
Final Thoughts
Homemade Raspberry Filling is a simple yet versatile recipe that adds a delicious pop of fruity flavor to just about any dessert. Whether you’re using it to fill cakes, drizzle over pancakes, or layer into a parfait, this filling is bound to become a favorite in your kitchen. Plus, with only a handful of ingredients and minimal effort, you can have it ready in minutes!
So, the next time you’re in the mood for a fruity dessert, whip up this easy raspberry filling and elevate your treats to a whole new level.

Raspberry Filling
Ingredients
- 1 1/2 cups raspberries fresh or frozen
- 2 Tbsp lemon juice
- 1 Tbsp corn starch
- 1/4 cup sugar
Instructions
- In a small saucepan, combine raspberries, lemon juice, and sugar over medium heat. Stir gently to coat the raspberries in the sugar and lemon juice.
- While the raspberries are heating, whisk together 1 tablespoon of corn starch and 2 tablespoons of water in a small bowl until smooth. Once the raspberry mixture starts to bubble, slowly add the cornstarch mixture, stirring continuously.
- Continue to cook the raspberry mixture, stirring frequently, for about 3–5 minutes, or until it thickens to your desired consistency. The filling should be glossy and coat the back of a spoon.
- Once thickened, remove the saucepan from the heat and let the filling cool. You can strain the filling through a fine mesh sieve.